Congratulations! Your search for “Best image compressor plugins for WordPress” has landed you in the perfect place. Here, we will be looking in detail at some of those plugins that can help with image optimization and compression and will be also covering some of the free plugins. But before jumping straight into the how-to, we will first be going over some technical definitions so as to better understand the process. So let’s get started without further ado.
What is a WordPress plugin?
WordPress plugins are essentially bits of code that “plugs in” to your self-hosted WordPress site. Hence, comes to the name “plugins”.In layman terms, a WordPress plugin is something that adds new functionality to your WordPress site or extends existing functionality on your site.
What is image compression?
Image compression is a process of reducing the size of the image by lowering its quality. Although the quality is only lowered to such a level that the image can still be clearly seen and accepted. This reduction in file size allows more images to be stored in a given amount of disk or memory space. It also reduces the time required for images to be sent over the Internet or downloaded from Web pages.
We use image compressors to compress an image. Each image compressor may work differently as there are various techniques of compressing an image where each technique differs from the other in terms of the amount of compression and the output quality.
Benefits of using an image compressor plugin
Following are the advantages of using an image compressor plugin for your WordPress site:
- Compressing an image reduces its size and hence it consumes less bandwidth and storage space.
- Compressed images reduce the overall page size.
- Using image compressor plugins facilitates faster loading times thereby making your WordPress site fast and smooth.
- They can also help in boosting the SEO of your site because of the fast loading pages.
- Lastly, compressed images save mobile data plans for you and your visitors alike.
Now that we know about image compression and the benefits of using image compression plugins on WordPress, let’s have a look at some of the best image compression plugins available on WordPress and how to use them.
Using EWWW Image Optimizer
About: Are you frustrated by a slow loading website? Do oversized images trouble you? Let EWWW Image Optimizer help you make your site faster, improve your bounce rate, and boost your SEO. But most importantly, make your visitors happier so they keep coming back for more.
EWWW Image Optimizer is a freemium WordPress plugin that optimizes your images by compressing them in the best possible way and maintaining the original quality as much as possible. With Easy IO, images are automatically compressed, scaled to fit the page and device size, lazy-loaded, and converted to the next-gen WebP format. The best feature of the EWWW Image Optimizer is its ability to bulk optimize. This feature lets you optimize all your images from a single page. This includes the media library, your theme, and a handful of pre-configured folders. EWWW Image Optimizer has no speed limits and unlimited file size facilitating smooth handling with pixel-perfect optimization using industry-leading tools and progressive rendering. All communications are secured with top SSL encryption thus making it highly safe.
EWWW Image Optimizer has three monthly packages. The Standard package costs $7, the Growth package costs $15 and the Infinite package costs $25 dollars. Although it also has a free version with a limited set of features but enough to get images compressed. All in all, it is a very powerful image optimization plugin for WordPress.
How to:
- Clickhere to download the free version of the EWWW Image Optimizer plugin to download the free version of the EWWW Image Optimizer plugin.
- Upload the “ewww-image-optimizer” plugin to your /wp-content/plugins/ directory.
- Activate the plugin through the ‘Plugins’ menu in WordPress.
- The plugin will attempt to install jpegtran, optipng, and gifsicle automatically for you. This requires that the wp-content folder is writable by the user running the webserver.
- If the binaries don’t run locally, you may sign up for cloud-based optimization here.
- It is recommended to visit the settings page to enable/disable specific tools and turn on advanced optimization features.
Using ShortPixel Image Optimizer
About: ShortPixel Image Optimizer is another such freemium, easy to use, comprehensive, stable and frequently updated image compression plugin supported by the friendly team that created it. It allows you to increase your website’s SEO ranking, number of visitors and ultimately your sales by optimising any image or PDF document on your website.
ShortPixel is an easy to use, lightweight, image optimization plugin that can compress all your past images and PDF documents with a single click. New images are automatically resized/rescaled and optimized on the fly, in the background. It’s also compatible with any gallery, slider or other e-commerce plugins. It uses minimal resources and works well with any shared, cloud, VPS or dedicated web hosting. It can optimize any image you have on your website even the images that aren’t listed in Media Library like those in galleries like NextGEN, Modula or added directly via FTP. It facilitates both lossy and lossless image compression for the most common image types (JPG, PNG, GIF, WebP and AVIF) plus PDF files. It also offers glossy JPEG compression which is a very high-quality lossy optimization algorithm. Other features include bulk optimization, independence from file size limits, CMYK to RGB conversion, the option to deactivate auto-optimizing images on upload and much more.

How to:
- Click here to download the ShortPixel Image Optimizer plugin to download the ShortPixel Image Optimizer plugin.
- Sign up here using your email.
- You will receive your personal API key in a confirmation email, to the email address that you provided.
- Upload the downloaded ShortPixel plugin to the /wp-content/plugins/ directory.
- Use your unique API key to activate the ShortPixel plugin in the ‘Plugins’ menu in WordPress.
- Uploaded images can be automatically optimized in the Media Library.
- It’s that simple.
Using Optimole
About: Optimole is a freemium plugin with basic and premium plans. It is the all-in-one solution to all of your image optimization and compression needs. With full automation and a range of evolutionary features, Optimole makes it easy to clean up your heavy images and bloaty pages.
Optimole optimizes your images in real-time with a cloud-based system to speed up your website and deliver high-quality images perfectly sized for every device. It’s this feature of real-time optimization and compression that makes it stand out among other image optimizers. With a one-click setup and minimal footprint, you can start improving your site in minutes and be free to concentrate on other aspects of your site while Optimole takes care of image optimization and compression in the best possible way.
This is how Optimole optimizes your images. Optimole’s format based optimization is handled in the cloud on a case-by-case basis. Once you have the plugin installed, Optimole will replace all of your image URLs with cloud-based URLs. When the image is requested, Optimole will apply the specific transformations required by the device and deliver it to your visitors. This means every image is perfectly sized for every device. The final result will be cached for a month to ensure ongoing fast delivery and more site speed.
Some of its noteworthy features include smart cropping, retina support, cloud library support, format based optimization, and much more. So, if you have been looking for one plugin that provides lazy loading with a CDN and perfectly sized images, then Optimole is perfect for you.
How to:
- Download the Optimole plugin from click here to download the Optimole plugin.
- Once downloaded, go to your WordPress Administration Panels and click on Add New option under Plugins from the menu.
- Click on Upload at the top.
- Browse the location and select the OptiMole Plugin and click Install now.
- Go to Media -> OptiMole and follow the instructions on how to enable the service.
- Enable the API key and your images will be optimized automatically.
Using TinyPNG
About: The popular image compression service, TinyPNG, has its own image compressor plugin for WordPress but, it not only compresses just PNG files but also compresses JPG and WebP. Make your website faster by optimizing your JPEG, PNG, and WebP images. This plugin automatically optimizes all your images by integrating with the popular image compression services TinyJPG and TinyPNG. After you upload an image to your WordPress site, each resized image is uploaded to the TinyJPG or TinyPNG service. Your image is analyzed to apply the best possible optimization. Based on the content of your image an optimal strategy is chosen. The result is sent back to your WordPress site and will replace the original image with one smaller in size. On average JPEG images are compressed by 40-60% and PNG images by 50-80% without visible loss in quality. Your website will load faster for your visitors, and you’ll save storage space and bandwidth!
You can also bulk optimize your existing JPEG, PNG, and WebP images all at once by going to Media > Bulk Optimization. Clicking on the big button will start optimizing all unoptimized images in your media library.
Some of its features include advanced background optimization to speed up your workflow, supports compression of animated PNG, WooCommerce compatible, WP Retina 2x compatible and much more. In a nutshell, it is a very popular and trusted plugin to compress your JPG, PNG and WebP images.
How to:
- Download the TinyPNG – JPEG, PNG & WebP image compression plugin from Click here to download TinyPNG-JPEG.
- Upload the tiny-compress-images directory to your /wp-content/plugins/ directory, using your favourite method (FTP, sFTP, scp, etc…)
- Activate the plugin from your Plugins page.
- Go to the Settings > TinyPNG – JPEG, PNG & WebP image compression page and register a new account.
- Or enter the API key you got from https://tinypng.com/developers.
- Go to Media > Bulk Optimization and optimize all your images!
- It’s that simple.
Using Imagify
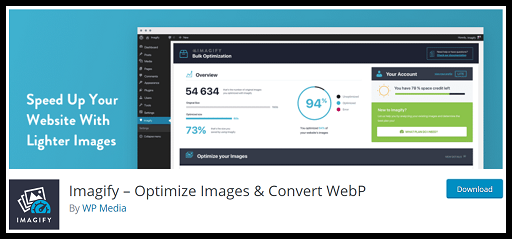
About: Imagify is another such freemium image optimizer plugin for WordPress. It lets you optimize images in one click: get lighter images without losing quality, convert WebP and speed up your website. Imagify can optimize all images: JPGs, PNGs, PDFs and GIFs whether animated or not. It can directly resize your images so you won’t have to lose time anymore on resizing your images before uploading them.
How to:
- Download and install the Imagify plugin from Click here to download imagify plugin.
- Upload the complete imagify folder to the /wp-content/plugins/ directory
- Activate the plugin through the ‘Plugins’ menu in WordPress
- If you want, you can navigate to the settings page through Settings > Imagify and configure Imagify to suit your needs.
In conclusion, using image compression plugins on WordPress makes your site smoother by shortening the image loading time and thus provides a greater UI experience to your visitors. Hope you try them out.


